Derezzed
This MP3 was found at Dilandau MP3

Sunday, April 24, 2011

Grr, I'm a Tiger!

I have these awesome Sally Hanson Nail Pens in a few different colors but I was really drawn to the black one today also, I was drawn to my orange nail polish, so why not put them together! Today we are doing TIGER NAILS/claws!


You will need: Orange nail polish and a Black nail pen!


Step 1: Paint all of your nails with the orange


Step 2: Using your nail pen, make short and tall, thin triangles on your nails..
It will look something like this!

Do the same thing to the rest of your nails, and your done!!

This is my Tiger =)

If you have any questions about my tutorials, please leave me a comment!

Thank you for reading!
xoxo,
Winter

Friday, April 22, 2011

Earth Day!

Today is Earth Day! So I'm going to show you an Earth Day nail tutorial!

You will need: blue, green and yellow (optional) nail varnish, and a dotting tool


Step 1: Using the blue polish, paint a small circle in the center of your thumb nail.


Step 2: Using the green polish and a small dotting tool, create small pieces of land on your globe!


*OPTIONAL: Using the yellow, paint on a little sun!*
*ALSO OPTIONAL: Alternating with the blue and green, create french tips on the rest of your nails*


DONE!


If you could go to one place anywhere on earth, where would you go?
I'd go to Ireland!

Thank you so much for reading my blog!

xoxo,
Winter


Thursday, April 21, 2011

An Apple a Day!

I love apples, and I'm going to show you all an apple nail design! (Comment me a little note or smiley face if you like apples too!)


You will need: Two colors of your choice for the apples (yellow, red, green etc.. depending on what kind of apple you want) also, a lighter green, and white for the inside of the apples!


You will also need: A pink (optional) for the worm, and brown for the stems.


A dotting tool...


And of course: An apple for inspiration!
(Can you tell I'm a Twilight nerd?)


Step 1: Paint your index and ring finger with both of your apple colors, leaving a small triangle-like shape at the top.


Step 2: Using the same two colors, carefuly paint a small apple shape on your middle and pinky fingers. *IT DOESN'T HAVE TO BE PERFECT!! Honestly, have you EVER seen an absolutely PERFECT apple?* The shape I made on my pinky looks kind of like lungs.. haha! 


Step 2.5 *OPTIONAL* Using the dotting tool, make a little wavy line with the pink color, underneath that fill in with light green. Then, give it a pair of eyes and a mouth =]


Step 3: Leaving a small outline of your apple color around, fill in the apple half (or lungs depending on how great your apple painting was) with white


Step 4: Add the stems and seeds with the brown and your done!!!!


Thank you SO much for reading my blog!

xoxo,
Winter


Monday, April 4, 2011

Keep Your Nails Healthy!

I've recently been doing some research on nail health and I thought I'd share some "Nail Knowlage" with you =)


To keep your nails healthy here are a few things you can do:

1. Keep your nails clean and dry.
2. Avoid nail biting and/or picking.
3. File your nails in one direction and round the tip rather than filing to a point.
4. Stay away from nail polish removers with Acetone and Formaldehyde.

Also here are some vitamins and some foods that are good to eat that are high in those vitamins:


Zinc: Prevents Yellowing, Deformed nails and Hangnails which are my worst enemy =P
Vitamin A: Helps increase skin cell health- healthier cuticals means faster nail growth!
Calcium: Helps nail growth and strength.


Foods high in Zinc: Shrimp, Crab, Chicken, Beef , Dark Chocolate, Cocoa Powder, Lamb, and Peanuts! (Fun Fact about peanuts: they are one of the ingridients in TNT)

Foods high in Calcium: Skim and Whole Milk, Plain low fat yogurt, Feta Cheese, Broccoli, Okra, Orange, and canned Sardines!

Foods high in Vitamin A: Cheese, Eggs, Raw carrots, Sweet Potatoes, Spinach, Mangoes, and Apricots!

Yum!!

I hope you enjoyed some "nail knowlage"

Thank you for reading!
xoxo,
Winter

Sunday, April 3, 2011

New Stuff!

I went shopping with my Mom today and got two cool nail things I wanted to share with you!


It looks kinda light blue in the picture but, I got a really pretty turquoise nail polish by Sinful Colors called Rise and Shine! I love it and can't wait to use it! I got a Sally Hanson nail art pen in Black, these are super cool because you use it just like you would a real pen, but it's on your nails instead of paper =P


Also I painted my nails! But I can't show you a tutorial because it wasn't my idea, but click *here*  to see how!
I did take pictures of how they came out though!


 It's a Converse shoe!!! I love these so I just had to paint my nails like this!


Please check out the tutorial!


Thank you so much for reading!
xoxo,
Winter

Saturday, March 19, 2011

Perfect in Purple

I am going to be doing some tutorials with a color theme!
I want to give the titles cute names according to the theme like: Perfect in Purple, Pretty in Pink, Green with Envy, Roses are Red.. Like that.
If you have any ideas about what I should do next, please leave me a comment letting me know! =)
~~~~~~~~~~~~~~~~~~~~~~~~~~~~~~~~~~~~~~~~~~~~~~~~

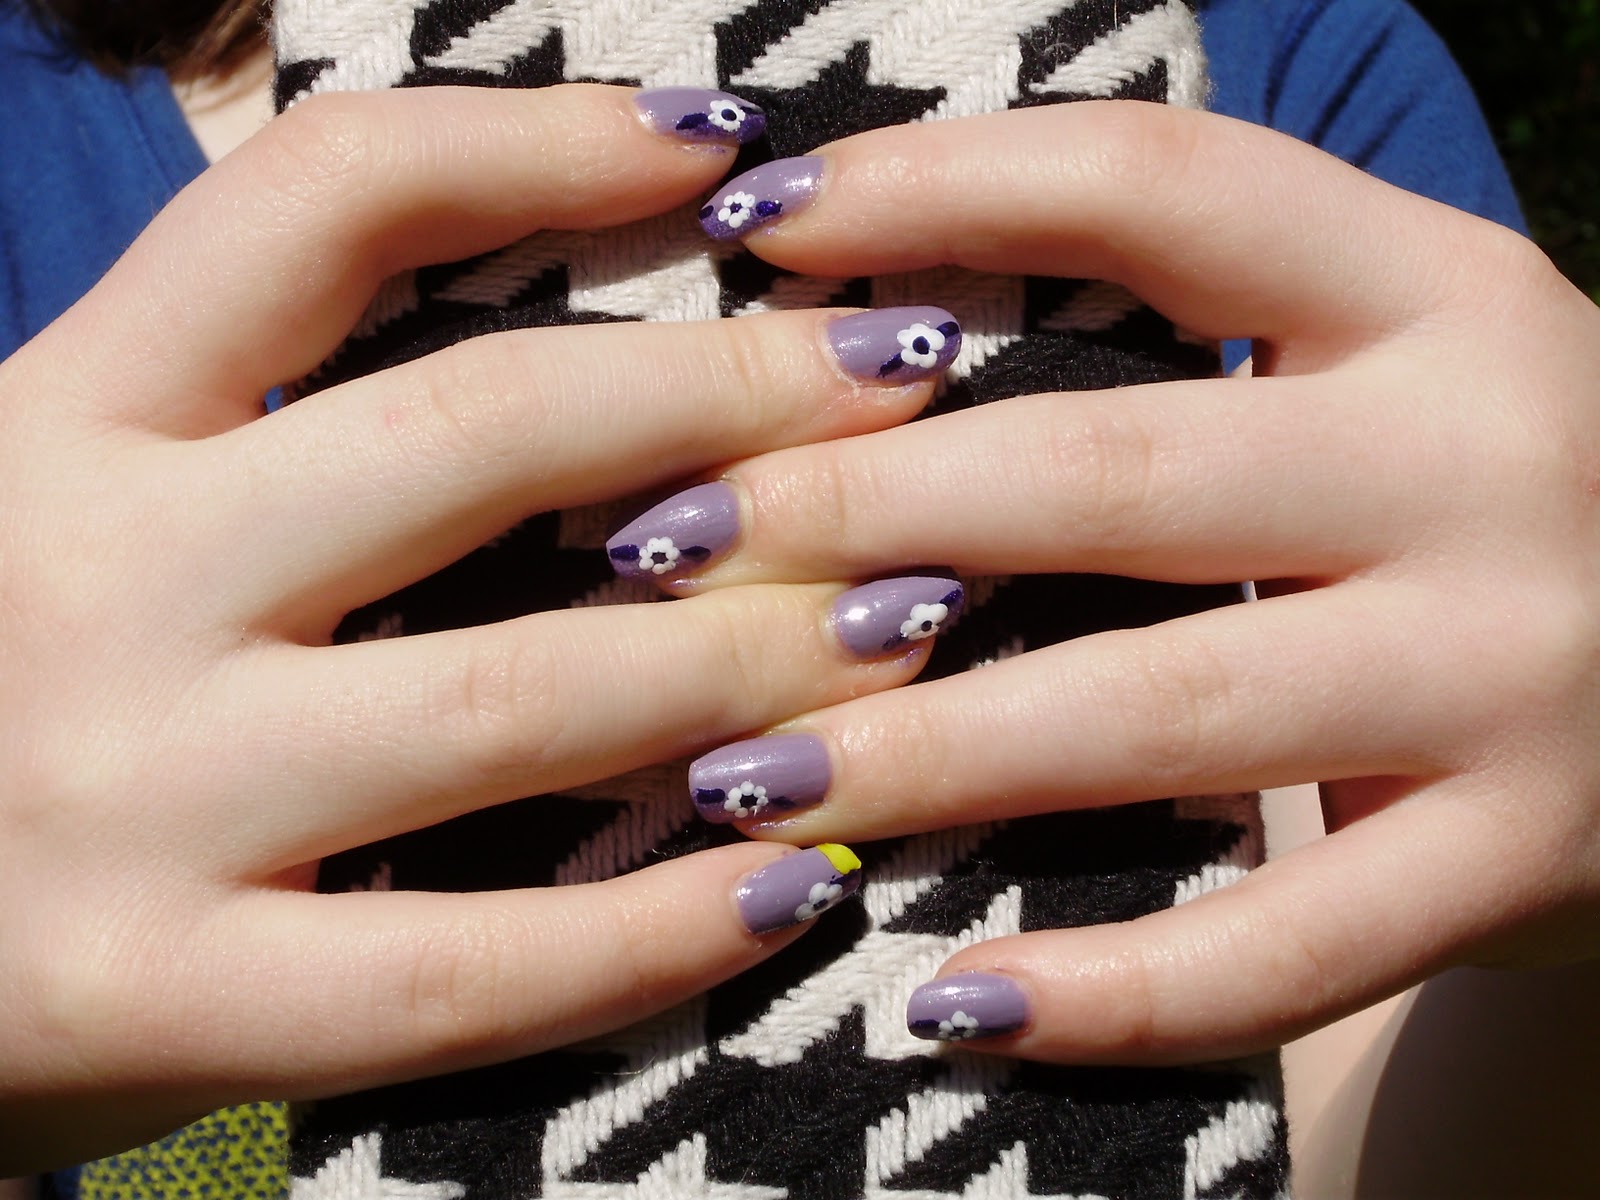
 I have a best friend who's birthday is next week, and her favorite color is purple! So, this tutorial is for her =)

You will need: White, Lavender, Violet, and Dark purple nail polish. Also: a dotting tool (here I am using the end of a paint brush) and a makeup sponge.

Let's get started!


Step 1: Using two coats of the lavender color, paint all the nails.


Step 2: Taking your makeup sponge, and the violet color, dab on the polish at an angle on the tip of the nail.


Step 3: Using the darkest purple, make a design that looks like this: -.- but the dot will be in the middle, not down lower =P


Step 4: Last Step! Using the white, and depending on the size- make 4 to 5 little dots around the purple one in the middle

All done!!


By the way: I love houndstooth! Isn't it cute!?


Thank you so much for reading my blog!

Best of luck
xoxo,
Winter

Sunday, March 13, 2011

St. Patricks Day

It's St. Patricks Day this week! So, I'm going to show you a Irish/St. Pattys Day tutorial!


You will need: Green, white, orange nail polish, and a dotting tool.


Step 1: Paint your index finger nails green. Do the same with your middle and ring fingers using the white in the middle and the orange on the ring finger.


Your nails should look something like this =)


Step 2: Using the dotting tool, paint three dots close together in a triangle to form a 'clover shape'
Remember: it doesn't have to be perfect =)


Maybe it's just me but, I think little clovers like this are so cute!


Step 3: This is optional! Taking your dotting tool, make a small circle on your thumb nail and shape it to look somewhat like a cauldron/bucket whatever you want to call it. Add little yellow dots in whatever pattern you like for the little gold pieces. And your finished!


Done!! Yay!


As always, I appreciate anyone who reads my blog =)
Happy St. Patricks Day!!

xoxo,
Winter